Testnet 3.0 — Function X Cross-Chain
Welcome to Function X Testnet 3.0 where users are able to perform cross chain functionalities on their personal blockchain. In this tutorial users will be able to send ERC-20 tokens into Function X blockchain. All tokens used in this tutorial are on Testnet, for ERC-20 tokens they are on Ethereum’s Kovan testnet and FRC-20 tokens on Function X’s Testnet 3.0.
What you will learn today (using FXCloud)
- Enable cross-chain transfer on your custom blockchain
- Set up a relay node on Ethereum (Kovan testnet)
- Set up on Function X (Testnet 3.0)
- Add tokens that you want to relay (eg: an ERC-20 DeFi token)
- Preview, Sign and Deploy!
You will also learn how to support the relays on f(x)Wallet.
- Support the relayed asset in f(x)Wallet
- Add asset to your f(x)Wallet
- Preview: additional features of f(x) Wallet
What you will need to start this tutorial
- f(x)Wallet (Android available only)
- FXCloud (get access via invitation code. See below for detail instruction.)
- Kovan Ether (Testnet)
- FXCoin (Testnet3)
- Lots of patience!
Important: please be aware that in this tutorial both the Ethereum blockchain and Function X’s blockchain are operating on respective testnets. If things break, please be patient and please do not use real (mainnet) tokens when using Testnet 3.0.
In order to test the above function, you need an invitation code to access FXCloud.
Enable Cross-Chain Transfer on a custom blockchain
The ability to perform cross chain transfer means that user is able to send tokens from one chain to another. In Testnet 3.0 we will enable the transference of an ERC-20 token (Kovan Ether) to Function X.
To enable cross-chain transfer in FXCloud, you will need to complete a Relay Function setup both on Ethereum and on your own blockchain in Function X Network. All this can be done without coding on FXCloud. You might also want to take a look at our previous tutorials on how to create your own blockchain on FXCloud.
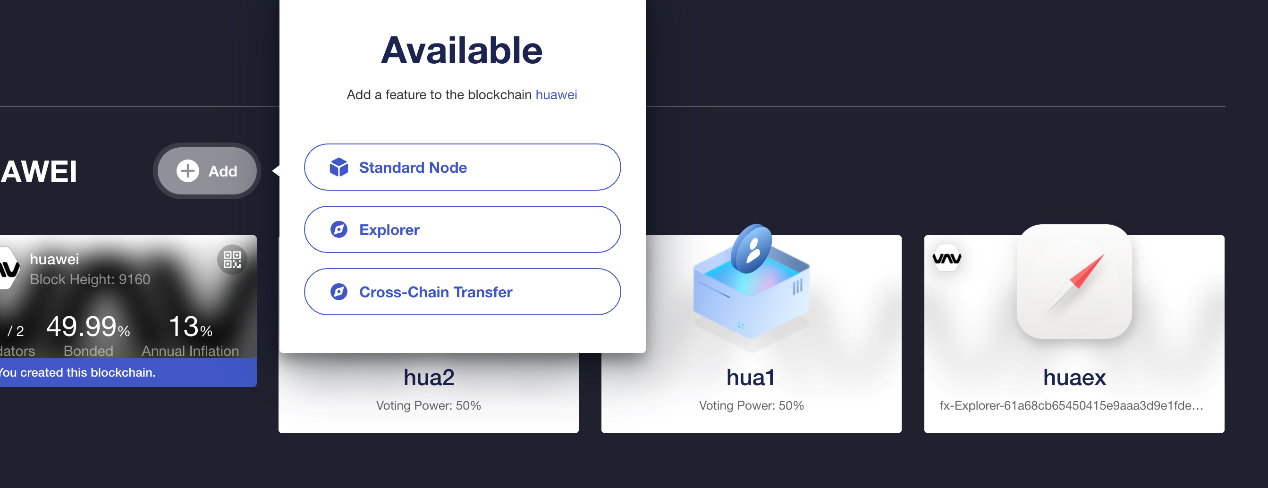
Image: screenshots on FXCloud
In FXCloud, please choose the “Cross-Chain transfer” setup in the image above.
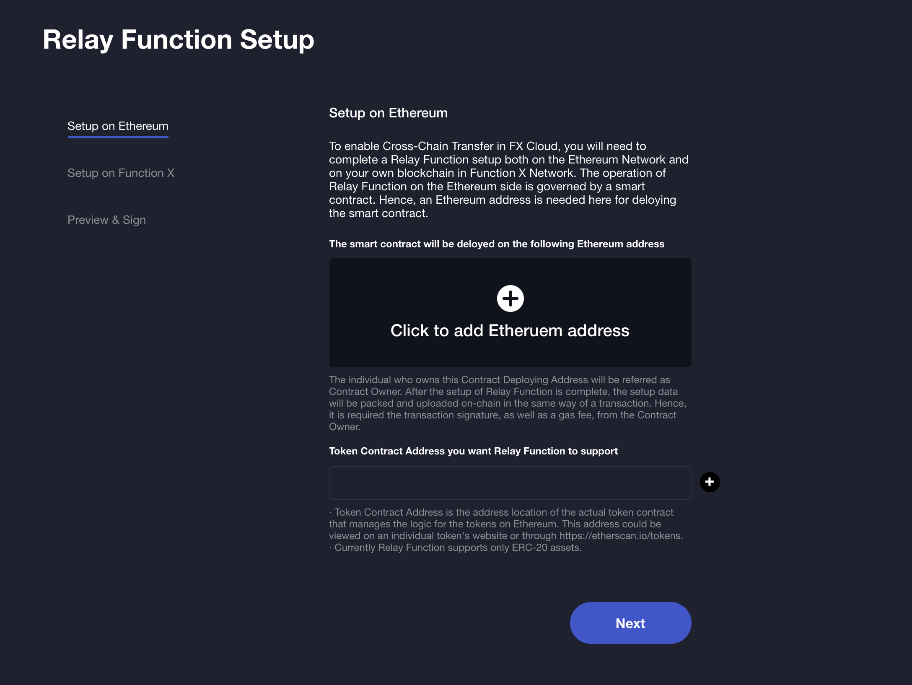
Setup on Ethereum (Kovan testnet)
The operation of Relay Function on the Ethereum side is governed by a smart contract. Hence, an ERC-20 address is needed here for deploying the smart contract.
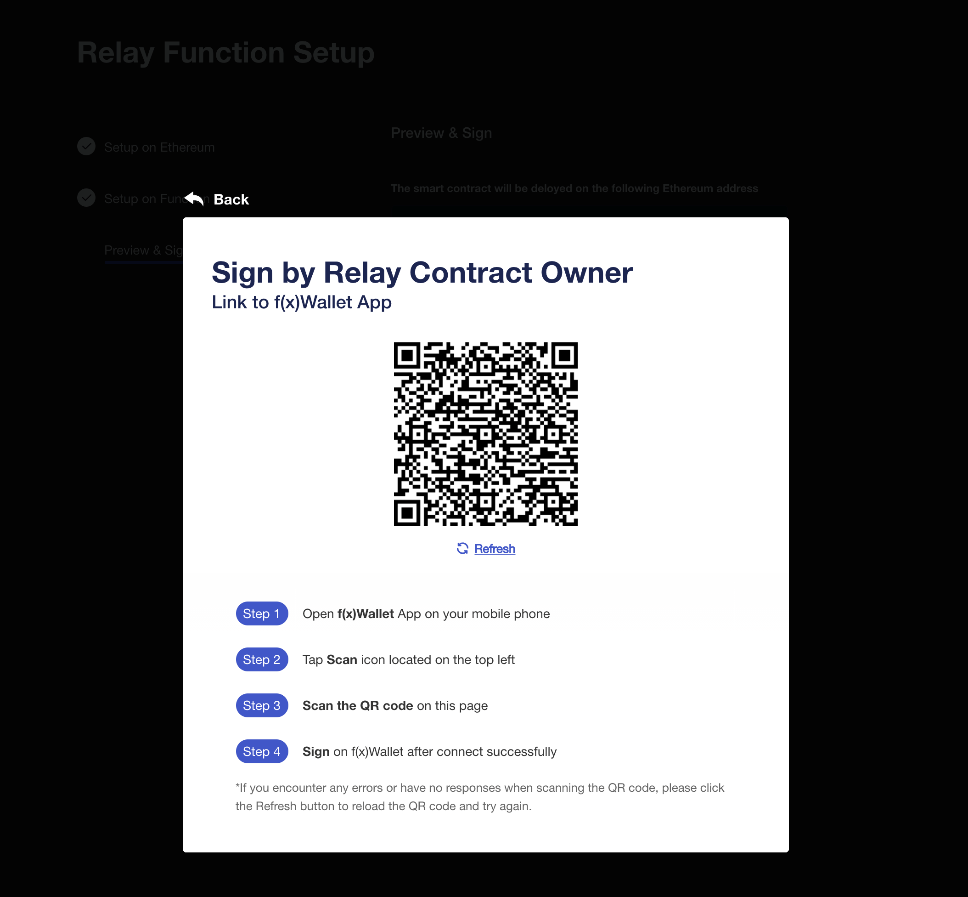
Concept: Contract Owner is the person that owns the contract-deploying address. The ownership is proven by signing the contract using owner’s private key. This is done by using f(x)Wallet to sign the contract displayed on FXCloud. This way the private key never leaves the owner’s app which is much safer. After the setup of Relay Function is complete, the setup data will be packed and uploaded on-chain in the same way of a transaction. Hence, it is required the transaction signature, as well as a gas fee, from the Contract Owner.
Concept: Token Contract Address. Currently Relay Function supports only ERC-20 assets. By pasting the Token Contract Address of your desired ERC-20 asset into the text box, this asset will be supported by Relay Function. Token Contract Address is the address location of the actual token contract that manages the logic for the tokens on Ethereum. This address can also be viewed on f(x)Wallet and https://kovan.etherscan.io/
- Add Ethereum address
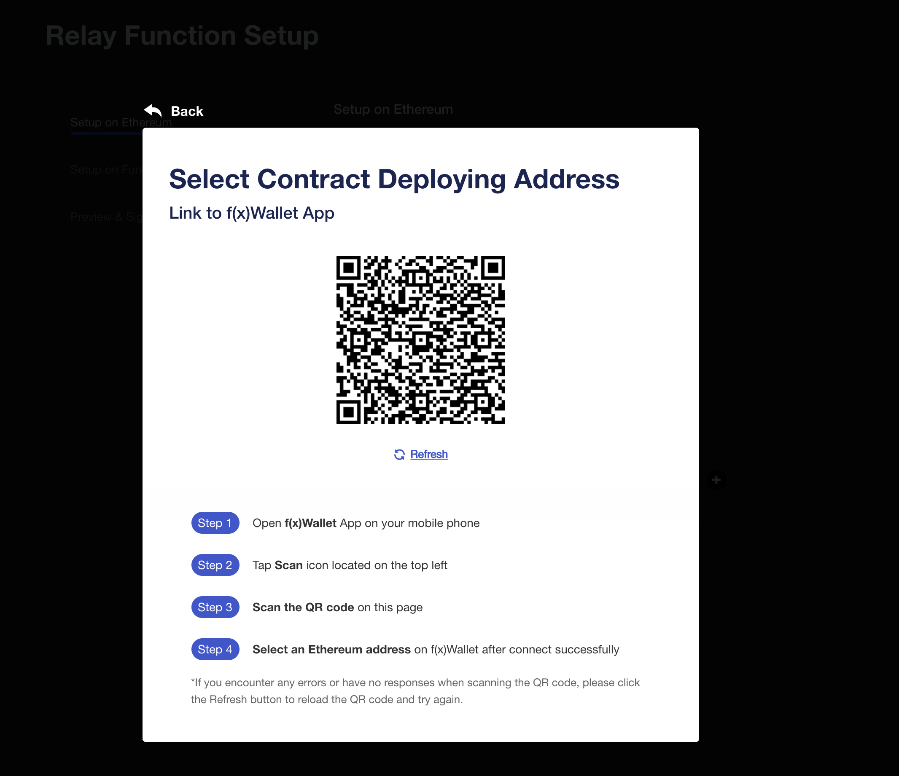
Click to add Ethereum address. This is the address of the contract owner, which means that the person that deploys the contract using this address will have the private key or ownership to this address.
Select an Ethereum address for contract deploying. You now go through the process of adding the address by scanning the QR code using f(x)Wallet.
Add Token Contract Address. You then process to add token contract address that you’d like the relay node to support, for example you may like to add some DeFi tokens such as SNX and LINK, hence you will key in their contract address (remember only Kovan addresses), we have provided some examples below.
Chainlink: 0xa36085f69e2889c224210f603d836748e7dc0088 (kovan)
UNI: 0x1f9840a85d5af5bf1d1762f925bdaddc4201f984 (kovan)
WETH: 0xd0a1e359811322d97991e03f863a0c30c2cf029c (kovan)
SNX: 0xC011a73ee8576Fb46F5E1c5751cA3B9Fe0af2a6F (kovan)

Setup on Function X
Once enabled, the operation of Relay Function on your chain in the Function X Network will be relied on the selected Validator Node(s). These nodes will be referred as the relay nodes. It is recommended to have multiple nodes for Relay Function. When there is only one relay node, Relay Function will stop once the node fails. In the case of multiple nodes, failure of some relay nodes is allowed.
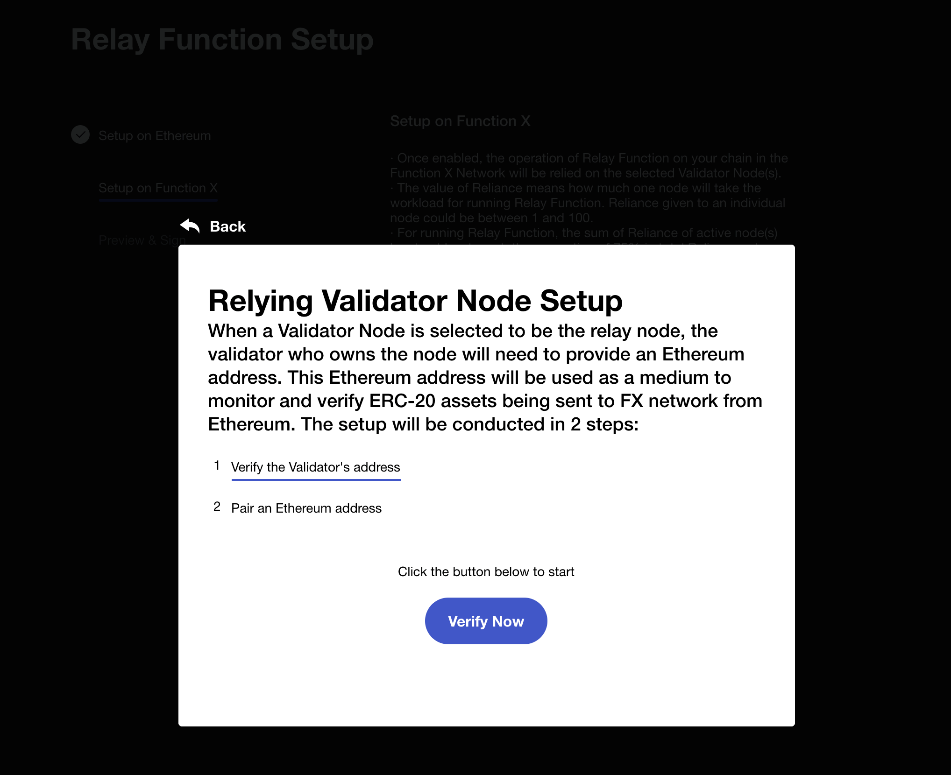
Verify Validator’s address and pair an Ethereum address
The setup will be conducted in two steps. Step 1 is to verify the Validator’s address- FX Cloud will verify the address you’ve entered whether it is a valid Validator address, or it is already used as a relying validator.
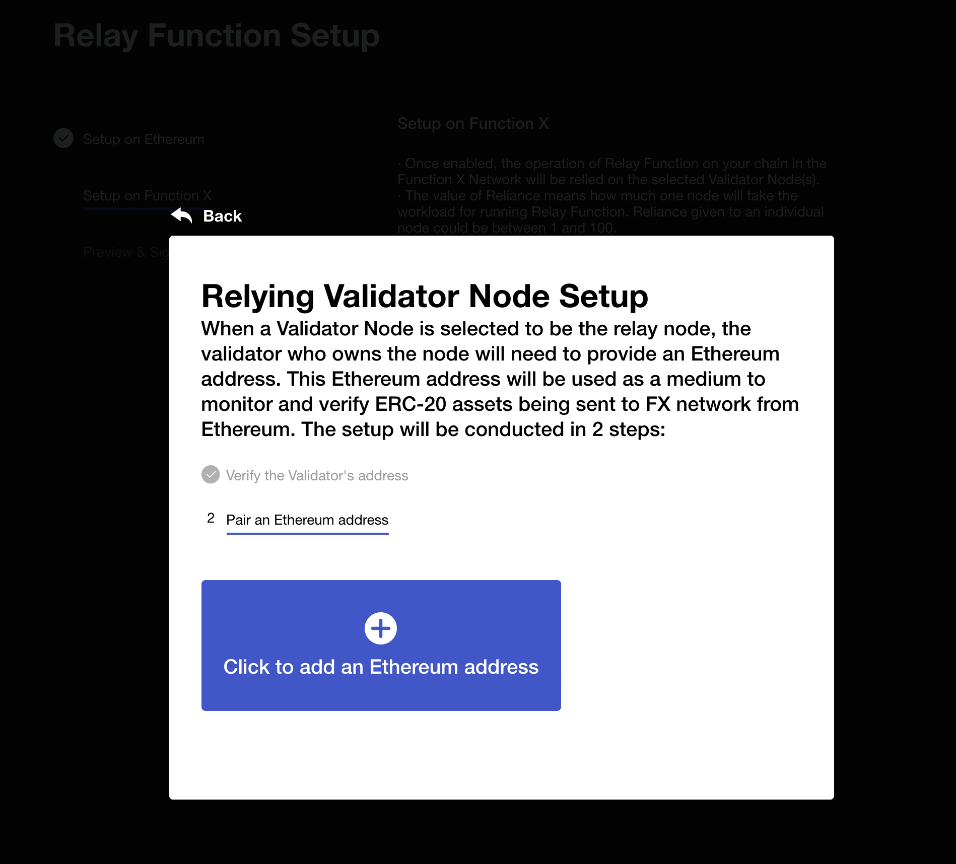
Step 2 is to pair an Ethereum address. When a Validator Node is selected to be the relay node, the validator who owns the node will need to provide an Ethereum address. This Ethereum address will be used as a medium to monitor and verify ERC-20 assets being sent to FX network from Ethereum.
1. Click to add the Validator address

2. Verify Validator’s address
3. Pair verified validator with an Ethereum address

4. Set up Reliance for relay node
Concept: Reliance — the value of Reliance means how much one node will take the workload for running Relay Function. Reliance given to an individual node could be between 1 and 100. For running Relay Function, the sum of Reliance of active relay node(s) has to at least reach the proportion of 75% in total Reliance value.
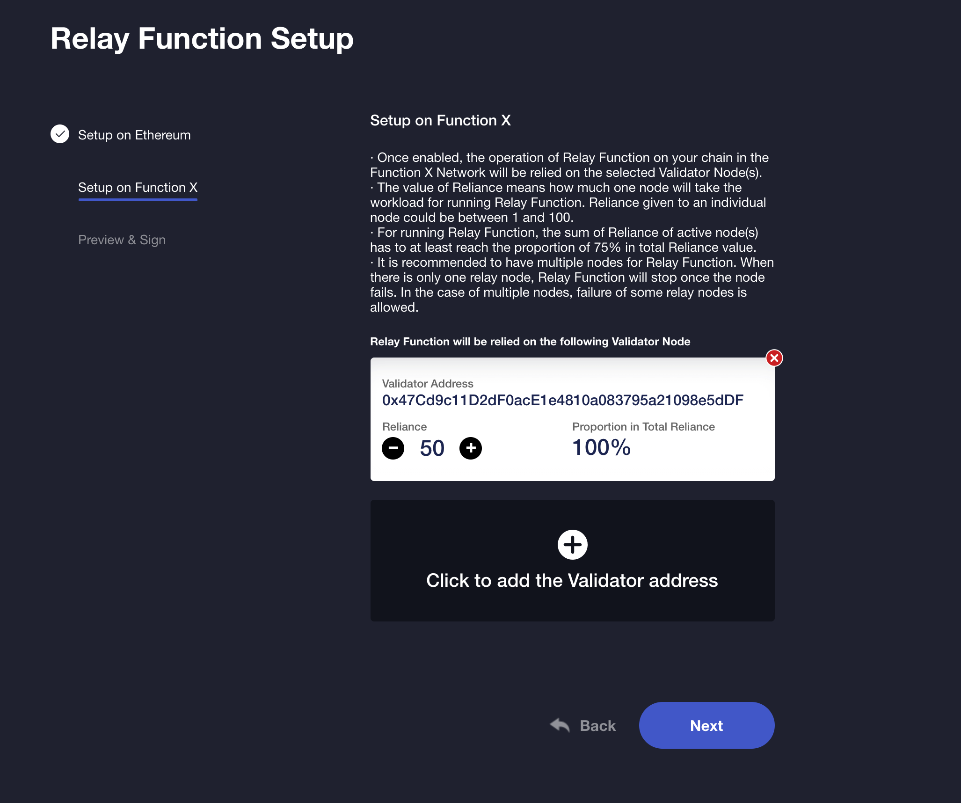
In Testnet 3.0, one relay node is sufficient to enable cross-chain transfer.
Preview & Sign
- Preview your Relay Function setup
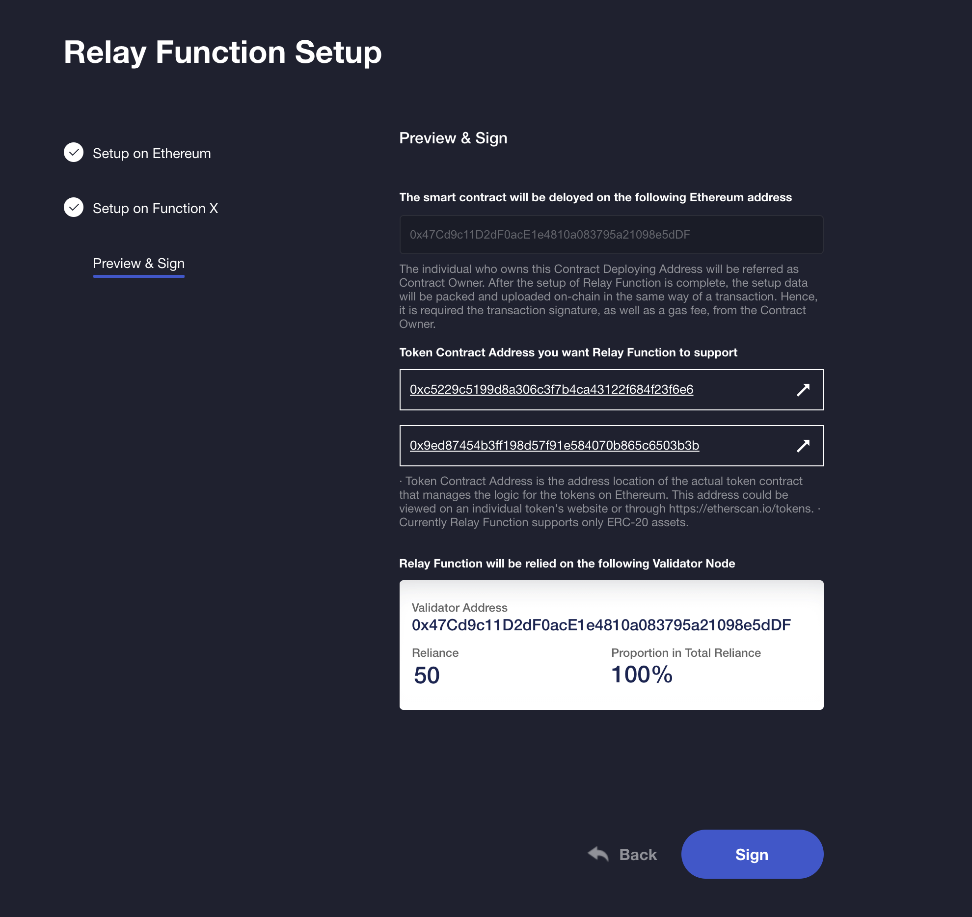
- Sign by Contract Owner
Support this chain’s asset in your f(x)Wallet
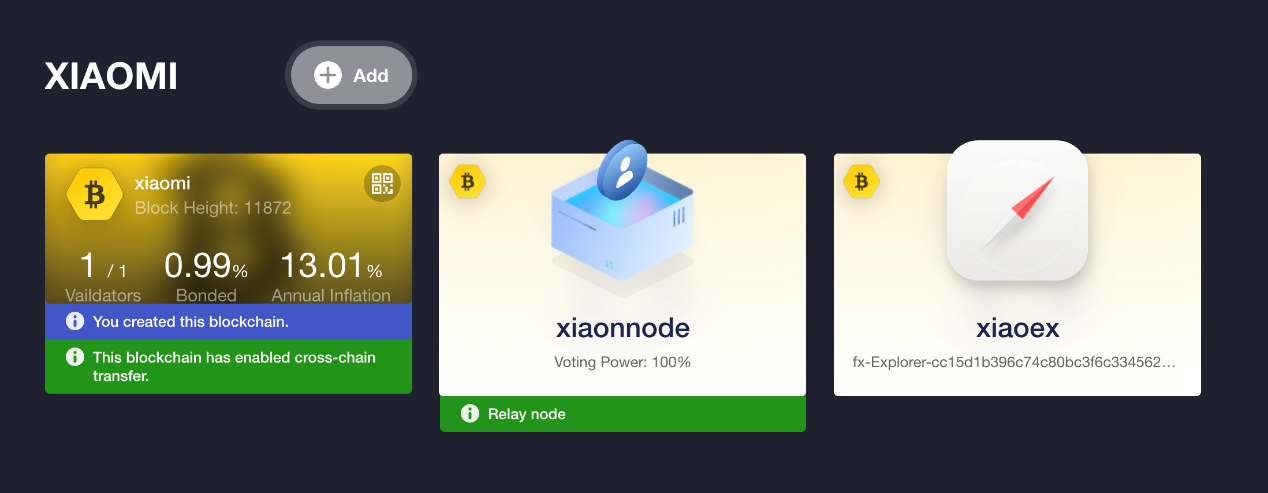
When Relay Function is initiated successfully, on the Dashboard you will find your chain now tagged with a green banner, saying “This blockchain has enabled cross-chain transfer”. To achieve the cross-chain transfer from your chain to the Ethereum network, and vice versa, it is required to support this chain and its assets in the f(x)Wallet application first.
Add assets to your f(x)Wallet
FX Cloud allows users to add the native token or any other assets supported on a blockchain to their f(x)Wallet application by QR code scanning.
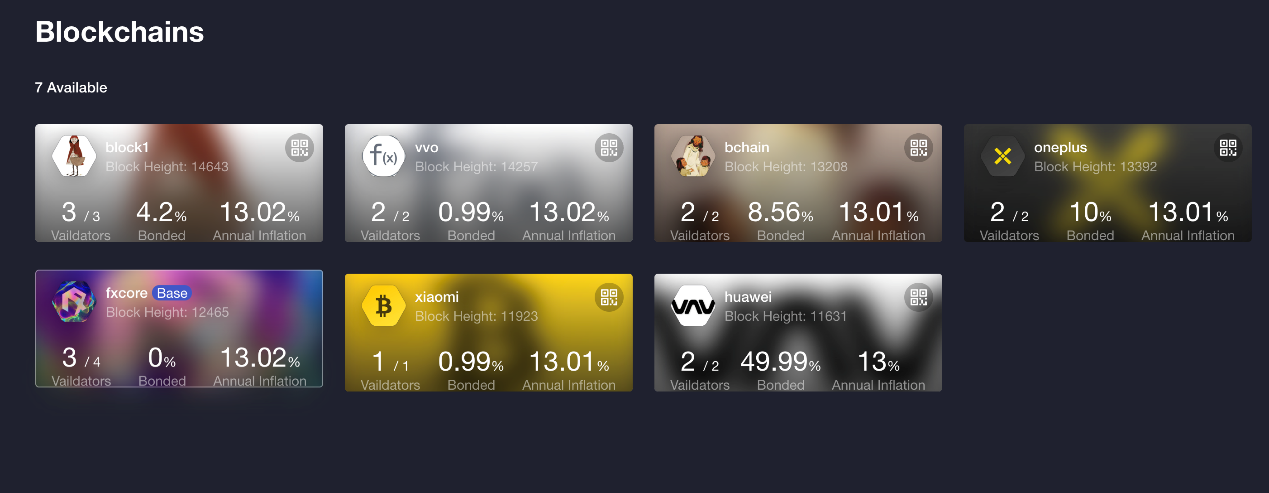
Go to Blockchains from the top menu, find your chain and click the QR code icon on top right
Select from the ERC-20 asset available on your chain and add to your f(x)Wallet
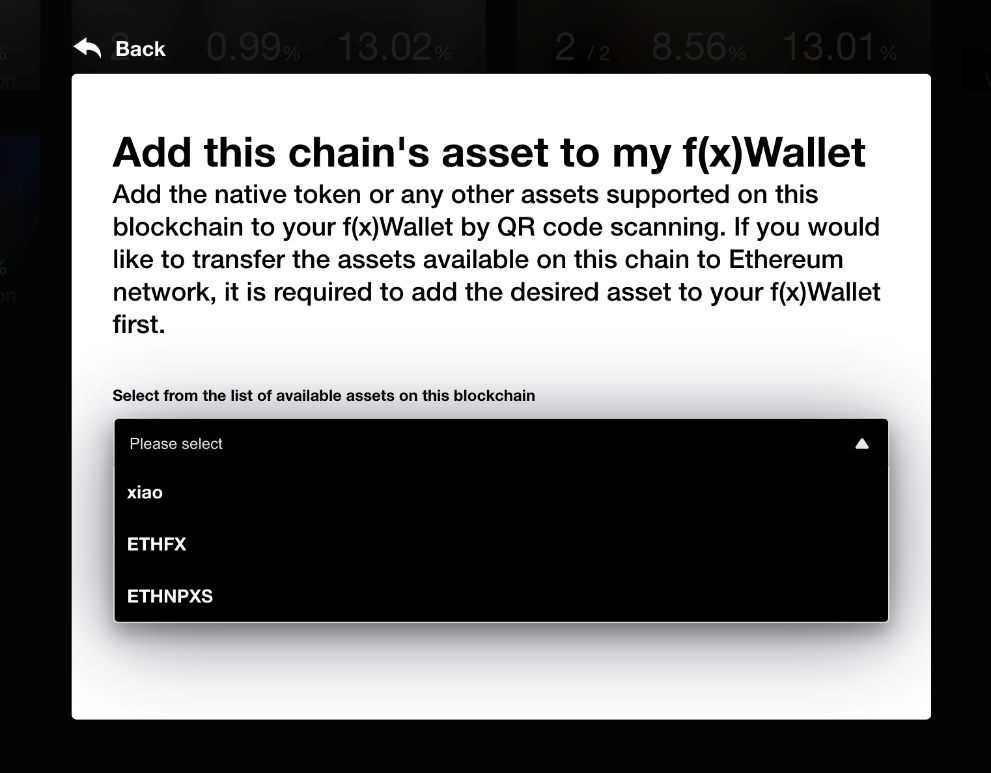
Select one asset, and click “Next”
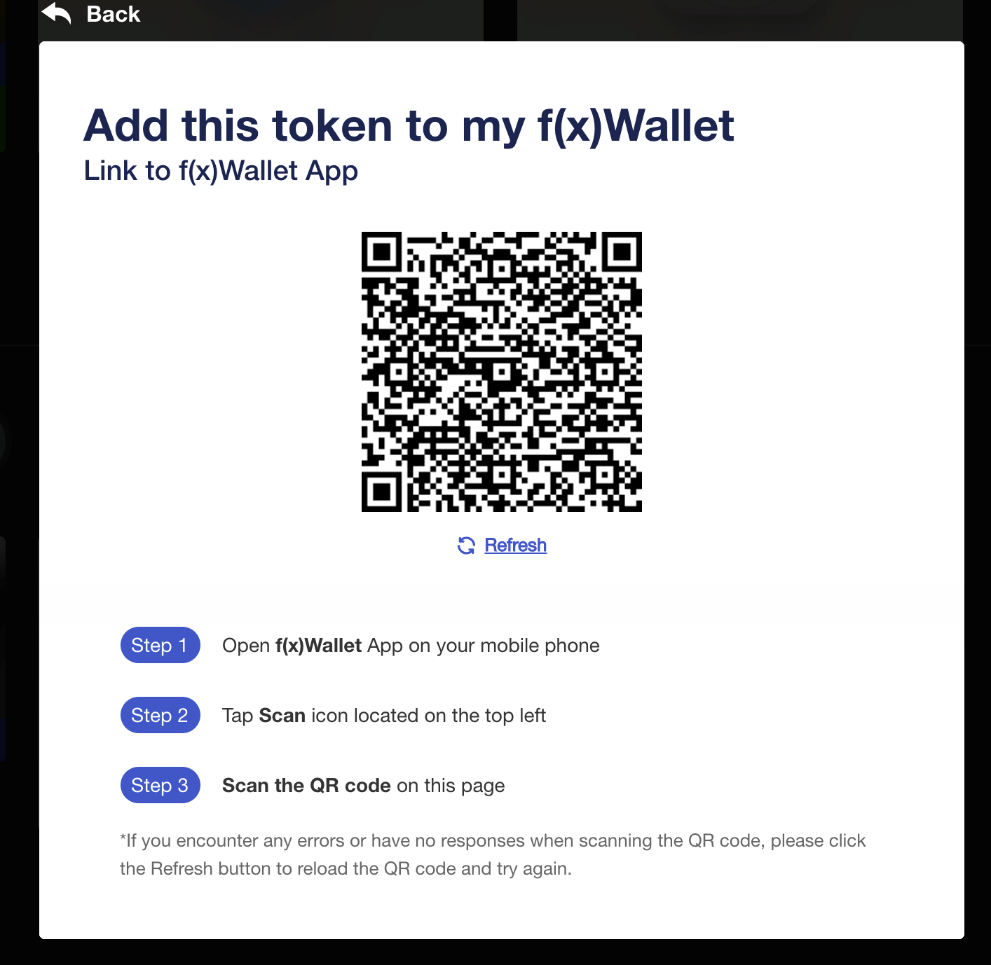
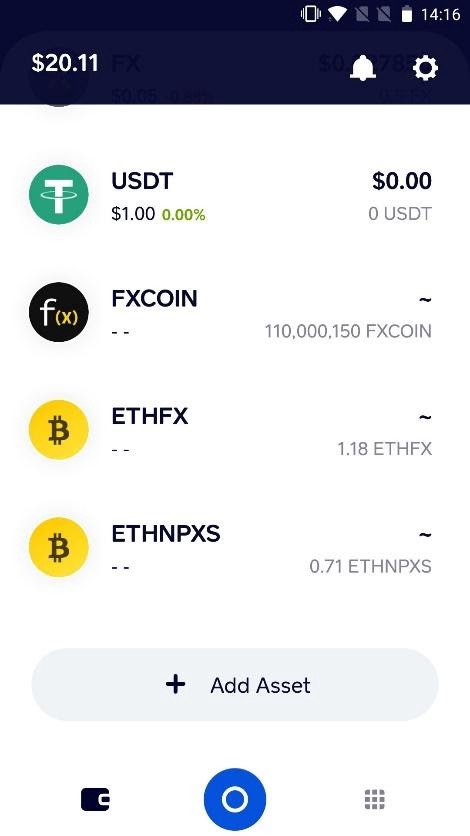
When you complete adding, the assets will be pinned on your f(x)Wallet homepage. Now you could enjoy a cross-chain transfer of digital assets in a hassle-free way using f(x)Wallet.
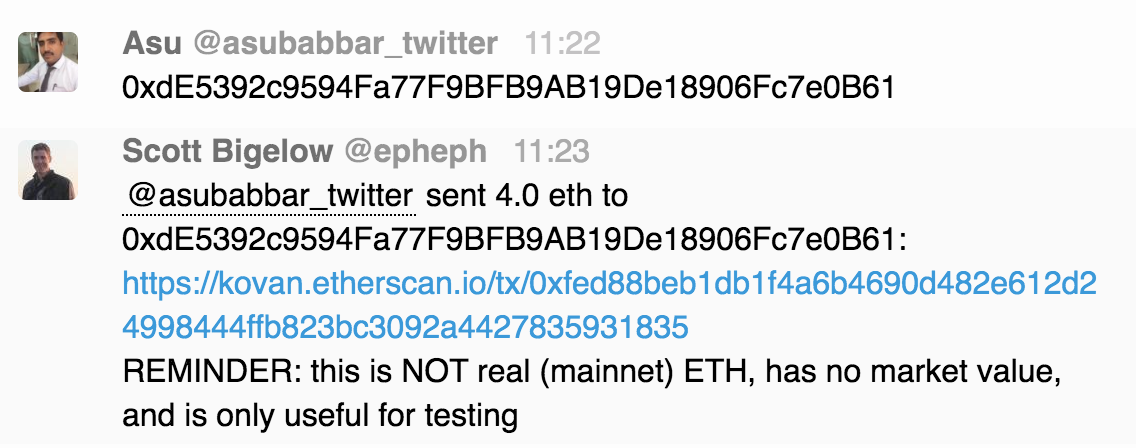
Get Kovan ETH for testing
You can receive Kovan Ether using Gitter (This is run by volunteers and the uptime is not guaranteed, you may have to wait for a verifier to respond). Simply comment with f(x)Wallet Kovan ETH address your address in the following Gitter channel:
https://gitter.im/kovan-testnet/faucet
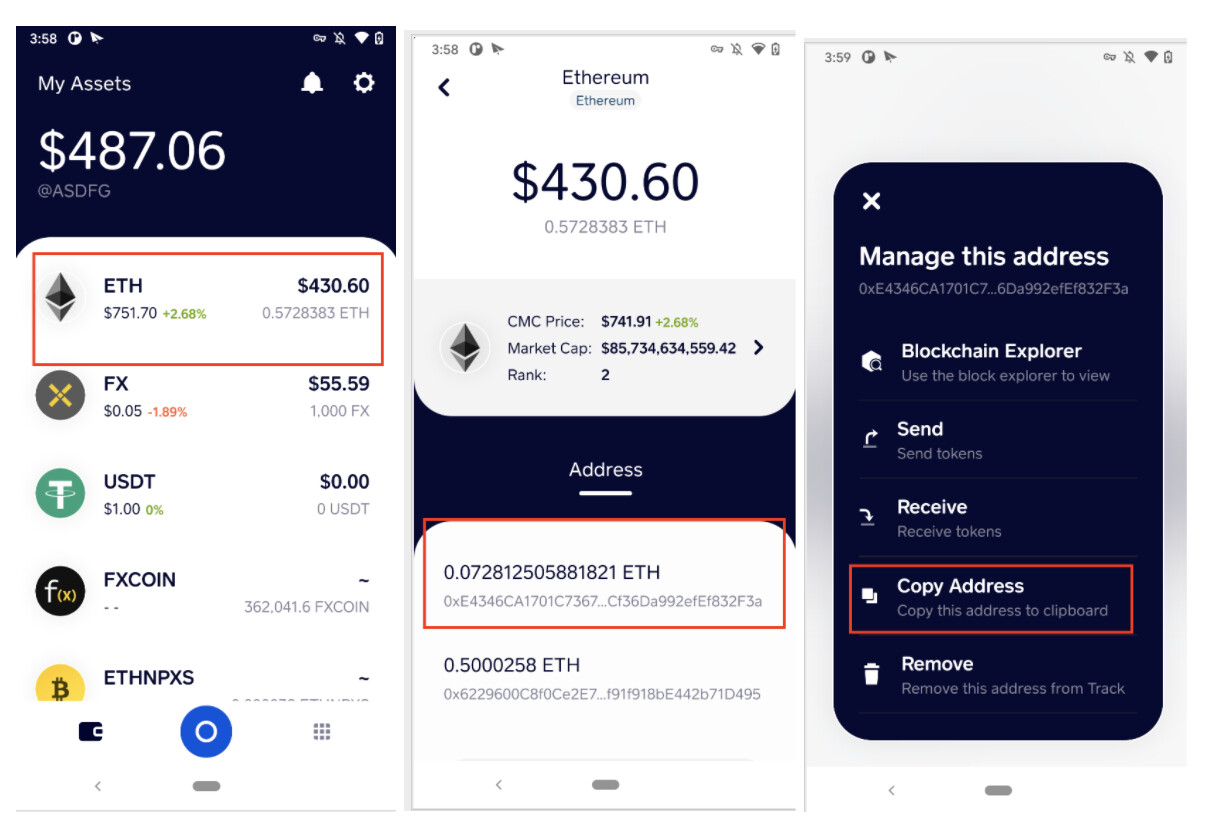
How to Copy your f(x)Wallet ETH address.
On FX Wallet, you can simply create a new wallet or restore your private wallet (ERC 20) to the application.
Notes: FX Wallet Testnet is running on Kovan Network (Ethereum Test Chain). All tokens in the Testnet are not using a real digital asset and do not have the real value. Due to the use of Kovan Network for testing purposes, we’ve restricted swap and DApp features in this version to avoid the loss of testers’ assets. Also, we open the testing for Android users only while we are fixing the issues for the iOS version.
Preview some additional features of f(x) Wallet
There are several features in the f(x)Wallet, such as Add Asset, Send & Receive Asset, Swap Asset (ERC20), and Connecting other Dapps. These features will be added over time in f(x)Wallet.
With decentralisation in mind, the wallet fully supports any ERC20 tokens and the plan is to allow users to add any kind of ERC-20 tokens into the wallet, and we are planning to add the tokens from other blockchain as well in the future.
In order to access the second most important feature of the application, you will need to click on the blue circle and a menu will appear. From here, you will see four buttons as follows: “Send”, “Receive”, “Swap” and “Scan”.
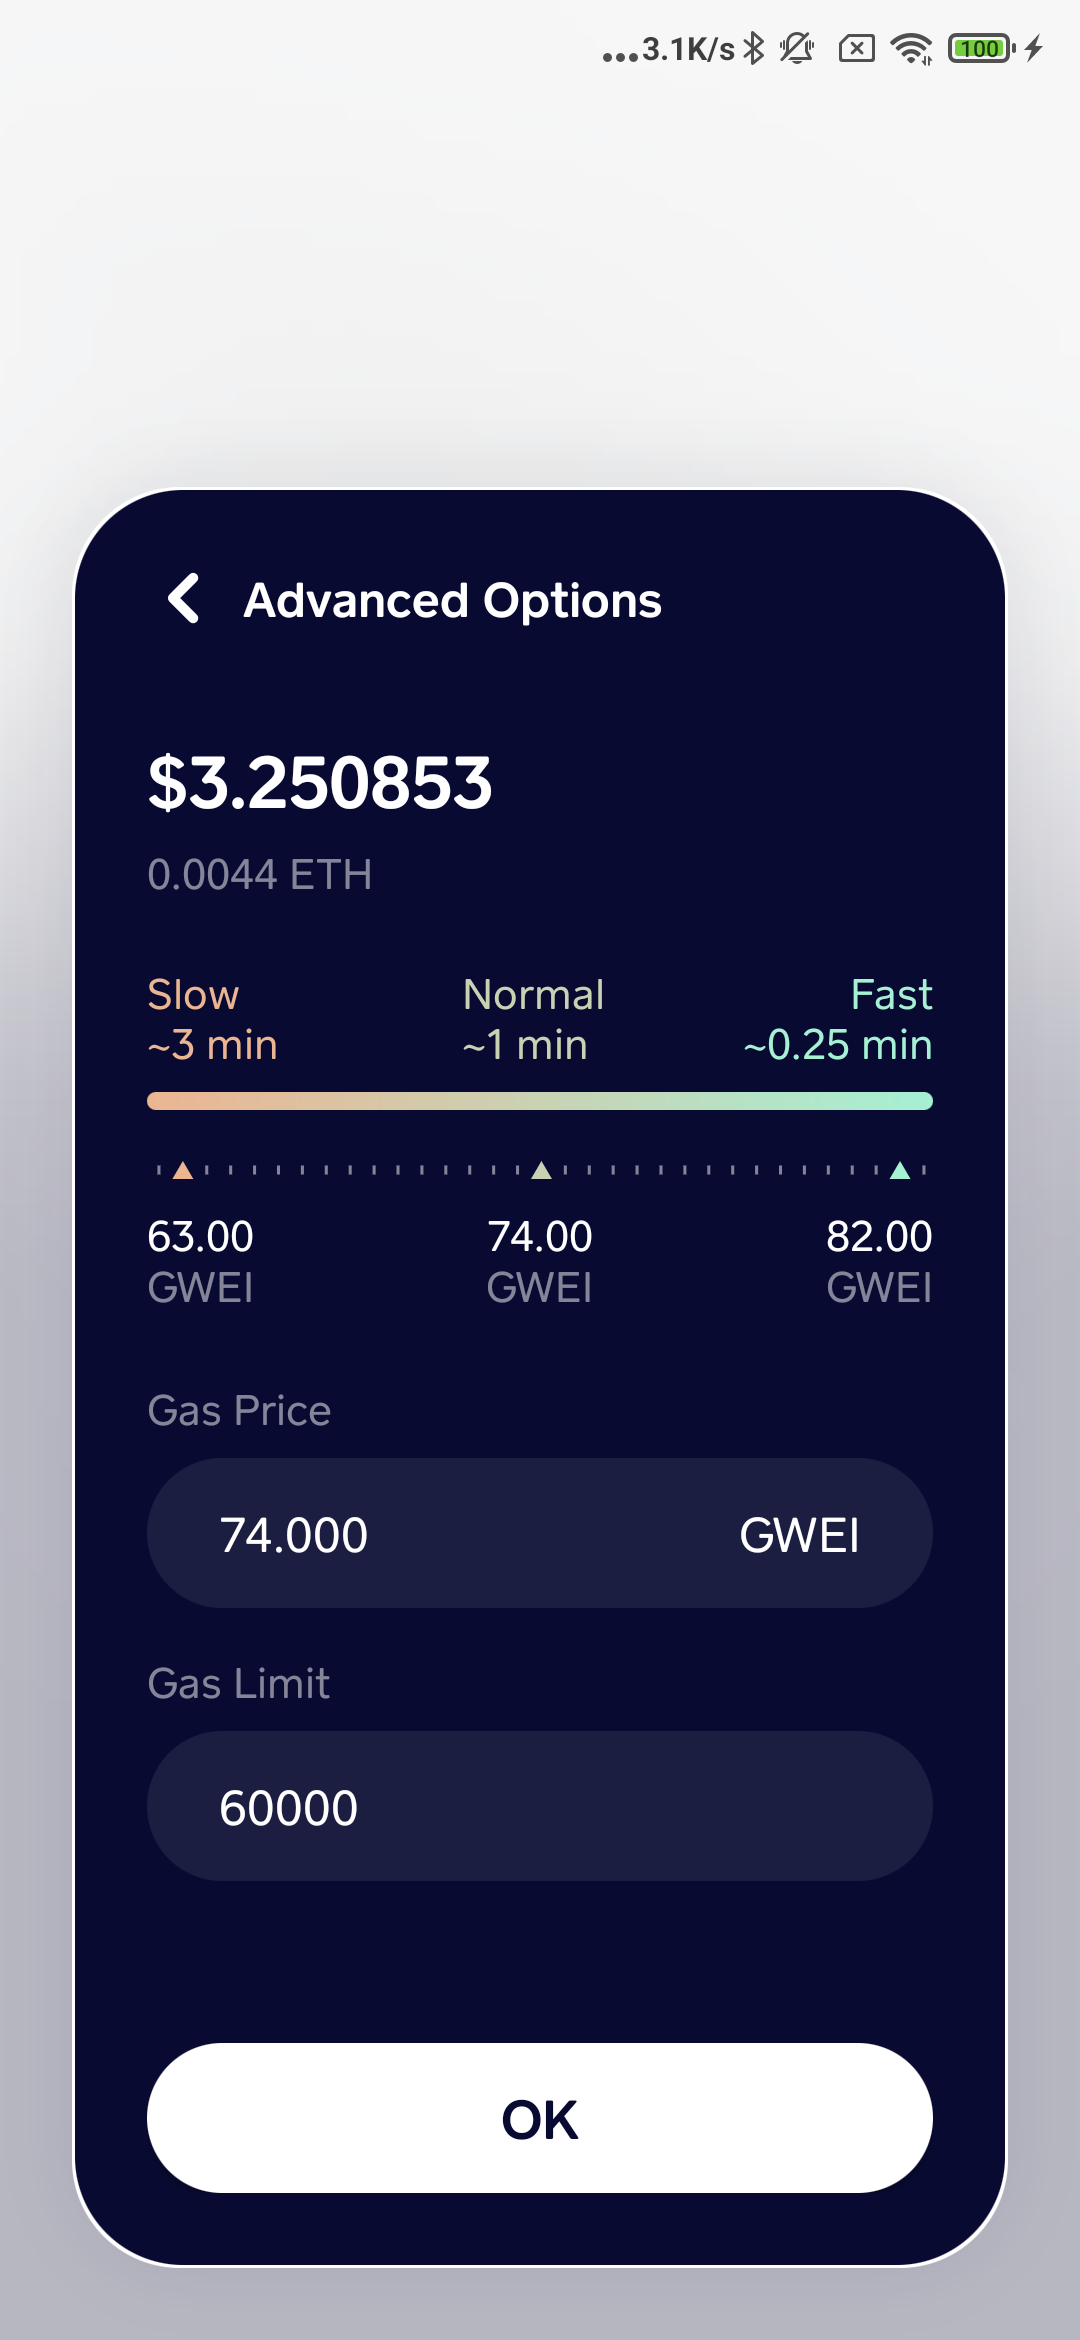
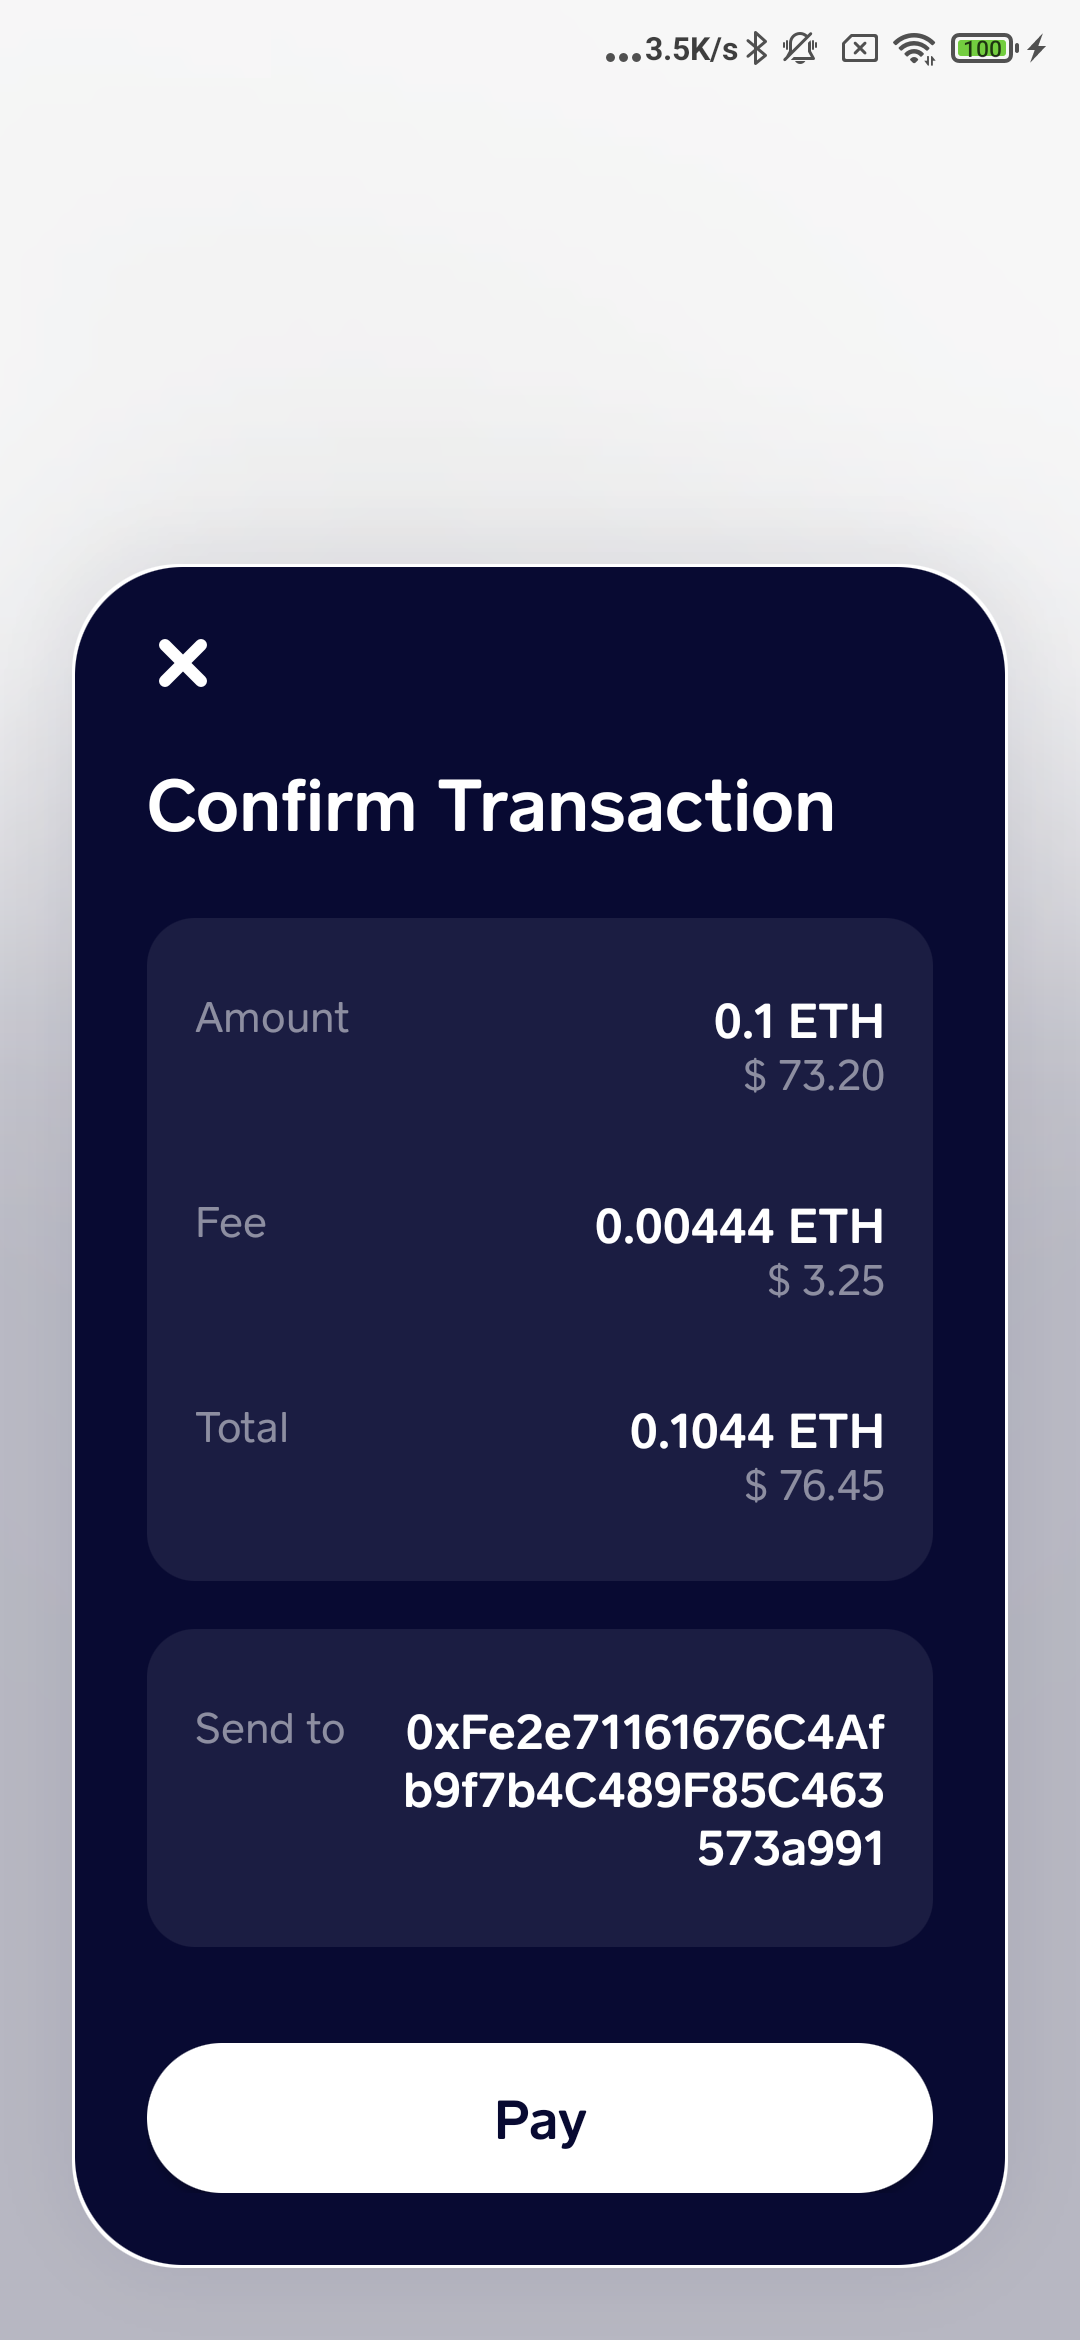
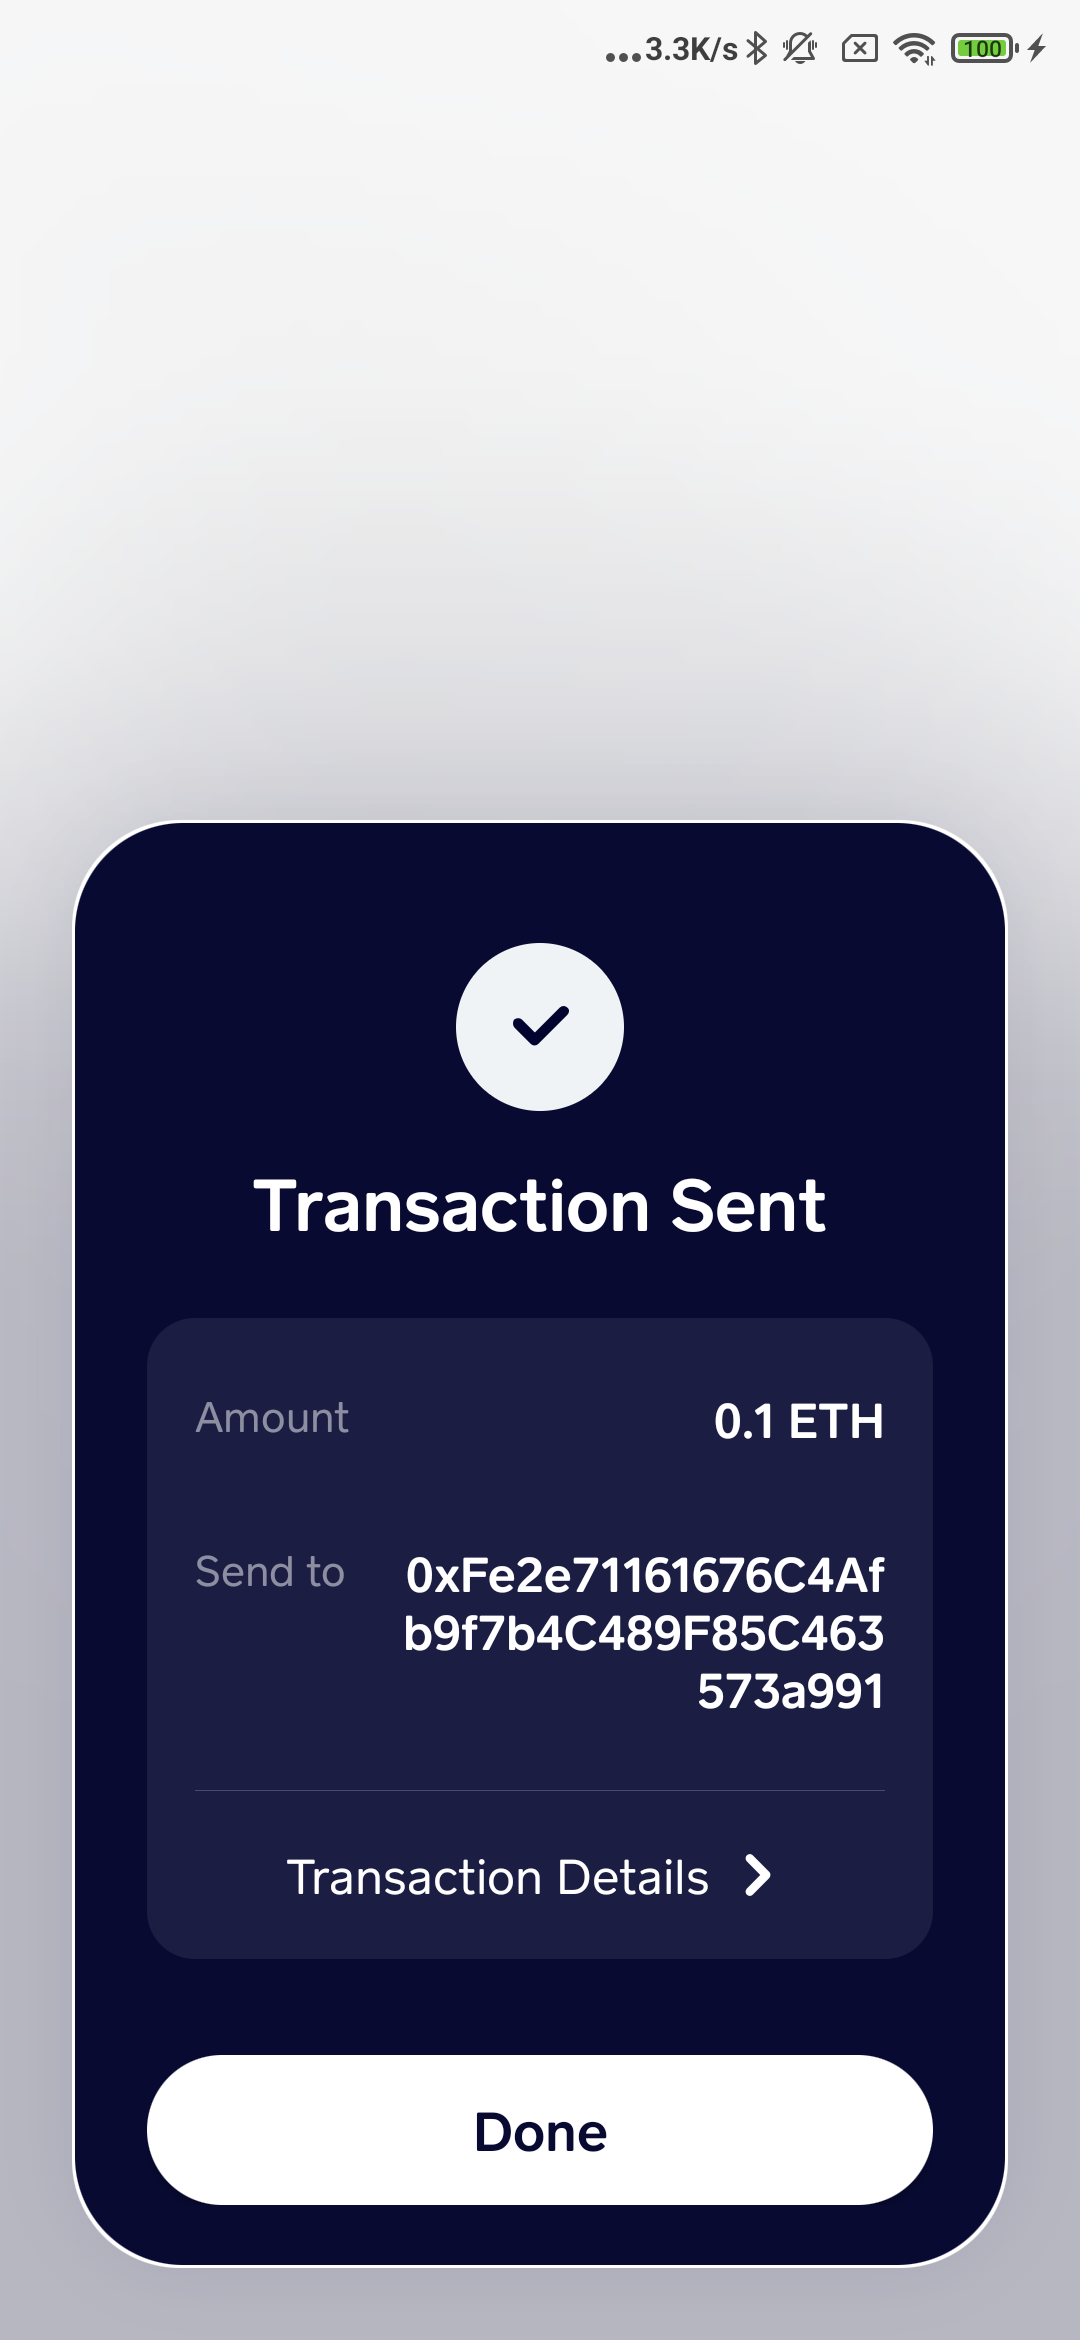
You can send any tokens listed on f(x)Wallet to other users, by adding their username (FX Wallet username) or their addresses (any wallet addresses). QR code scanning feature is also available in this version, so users can send the tokens by scanning the recipient’s QR Code. You can adjust the gas fee of the transaction based on your needs (Slow, Normal, or Fast) or you can set your Gas Price and Limit by choosing the Advance Options.
To receive tokens for other users, you can simply share your address to the sender, or they can scan your wallet’s QR Code.
One of the upcoming features in f(x)Wallet is the Swap feature. In the test version, we’ve restricted this feature due to the use of f(x)Wallet on Kovan Network. Testers will not be able to test this feature to avoid the loss of their digital assets.The Swap feature does exactly what it sounds like, it helps you to swap tokens. By clicking the button, you will have to select an asset that has been already added to your wallet, the next window will require you to select the second asset with which you want to swap the initial asset.
The other feature in this f(x)Wallet is connected to other DApp by QR Code scanning. This feature will be accessible by clicking the scan option. Once you have scanned the QR code, you will need to authorize it before you can access the DApp. These are the basic features of a private wallet today. These concepts are under preview and will be added periodically into f(x)Wallet.
How to join the Testnet 3.0?
For those who have registered and participated Testnet 1.0 and Testnet 2.0, you will receive an invite code via email. We also open 10 slots for new users and prioritize to FX owners. If you haven’t participate the testnet yet, here is the last chance to get familiar with. Register at https://www.hub.functionx.io/become-a-validator.
All the invitation codes will be sent out no later than Jan 5, 2021. Again, we know the testnet 3.0 is not perfect yet. Your feedback and suggestion are desperately needed.
We wish you a Happy 2021.